
-
Social Sharing Kit: Setting up
SOCIAL SHARING KIT
With Assemble's Social Sharing Kit, you can create messages and images that website users can post onto social media. A single post is formatted to suit posting directly onto Facebook and Twitter with a download option for Instagram. Giving fans something to share is a great way to promote.
Adding a social sharing kit is a two part process:
1. Adding the social kit elements
2. Adding the module to the page
Below is a step-by-step guide to setting it up.
1. Adding the social kit elements
Visit the social sharing kit in the left hand navigation bar in your Assemble dashboard. You can find it under content -> Social Sharing Kit
- Add and customize your social sharing kit items: Title the post and select where you want it to link to (for instance the screenings page, or the home page).
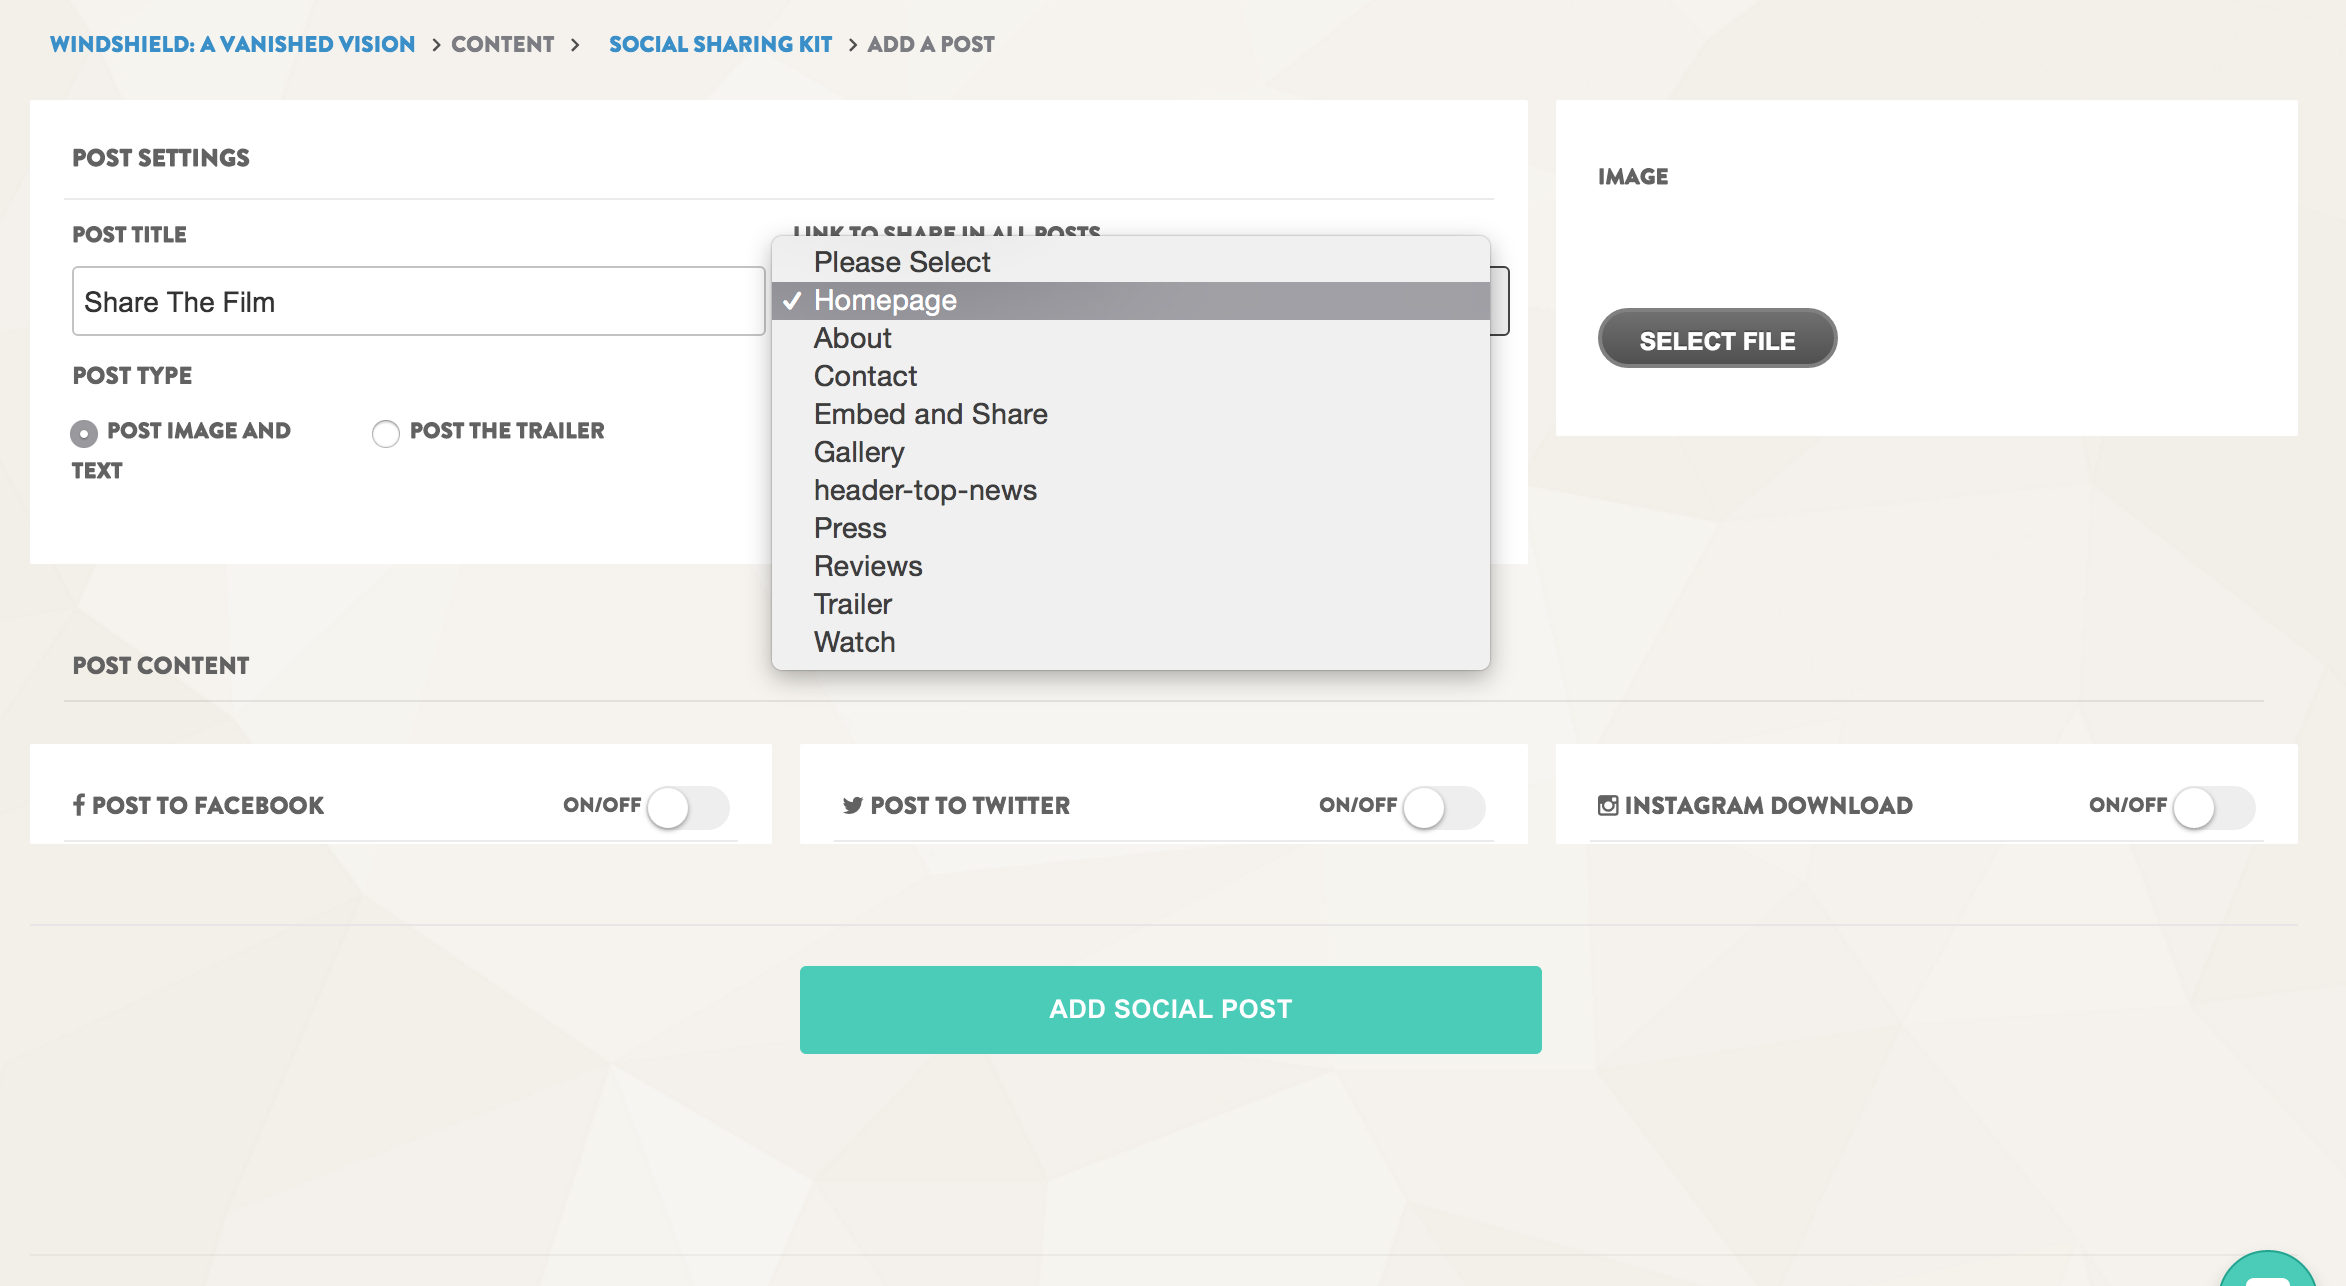
- Select your platforms: Turn on Facebook, Twitter and Instagram download if you want the post to be shareable on those platforms.
NOTE: Make sure to add an image for EACH platform you want the post to go to, and to add the text for each platform as well.
- Facebook prefers images be cropped at 1200 x 627 pixels
- Twitter prefers 1024 x 512 pixels
- Save the item: You will be taken back to the social sharing kit dashboard, where you can reorder the items (drag and drop them into the order you prefer), edit past items, or add a new item.
2. Adding the Social Sharing Kit module to the page
Now that you have created your social sharing kit items, you have to add them individually to the chosen webpage.
- Visit the pages editor in your left hand dashboard (content -> web pages) and click ‘edit’ on the page in which you wish to add the module - or create a new page.
- In the page editor, add a new module and select the ‘'social sharing kit’ module from the dropdown list.
- Now you are in the social sharing kit module editor. Select 'single' if you want to add a single social sharing kit item, or 'all' if you want all the social sharing kit items listed - one above the other.

- If you selected 'single', make sure to select the social sharing kit item you want to put in that location, in the dropdown under 'POST'. The dropdown menu will list all the items you created in step 1!
- Save the module. You will be taken back to the page editor, where you can add another social sharing kit item in a new content module, if you wish!
- Don't forget to save the page, when you are done adding the items into content modules!
> For more information on adding modules to pages, see our modules help section
Updated: April 2020
Continue reading -
'Where to Watch' App
WHERE TO WATCH
List all your VOD, cable and even physical merchandise here. Want to sell direct too? Don't forget the Assemble Store app adds a full shopping cart to your site.
Adding the ‘where to watch’ functionality is a two part process:
1. Adding the VOD, DVD and Blu-Ray links to the module
2. Adding the module to the pageSee below for a step by step on how to add 'Where to Watch' functionality to your site on Assemble.
1. Adding the links to the module
 Go to Content -> Where to Watch in the left hand navigation bar of your Assemble dashboard.
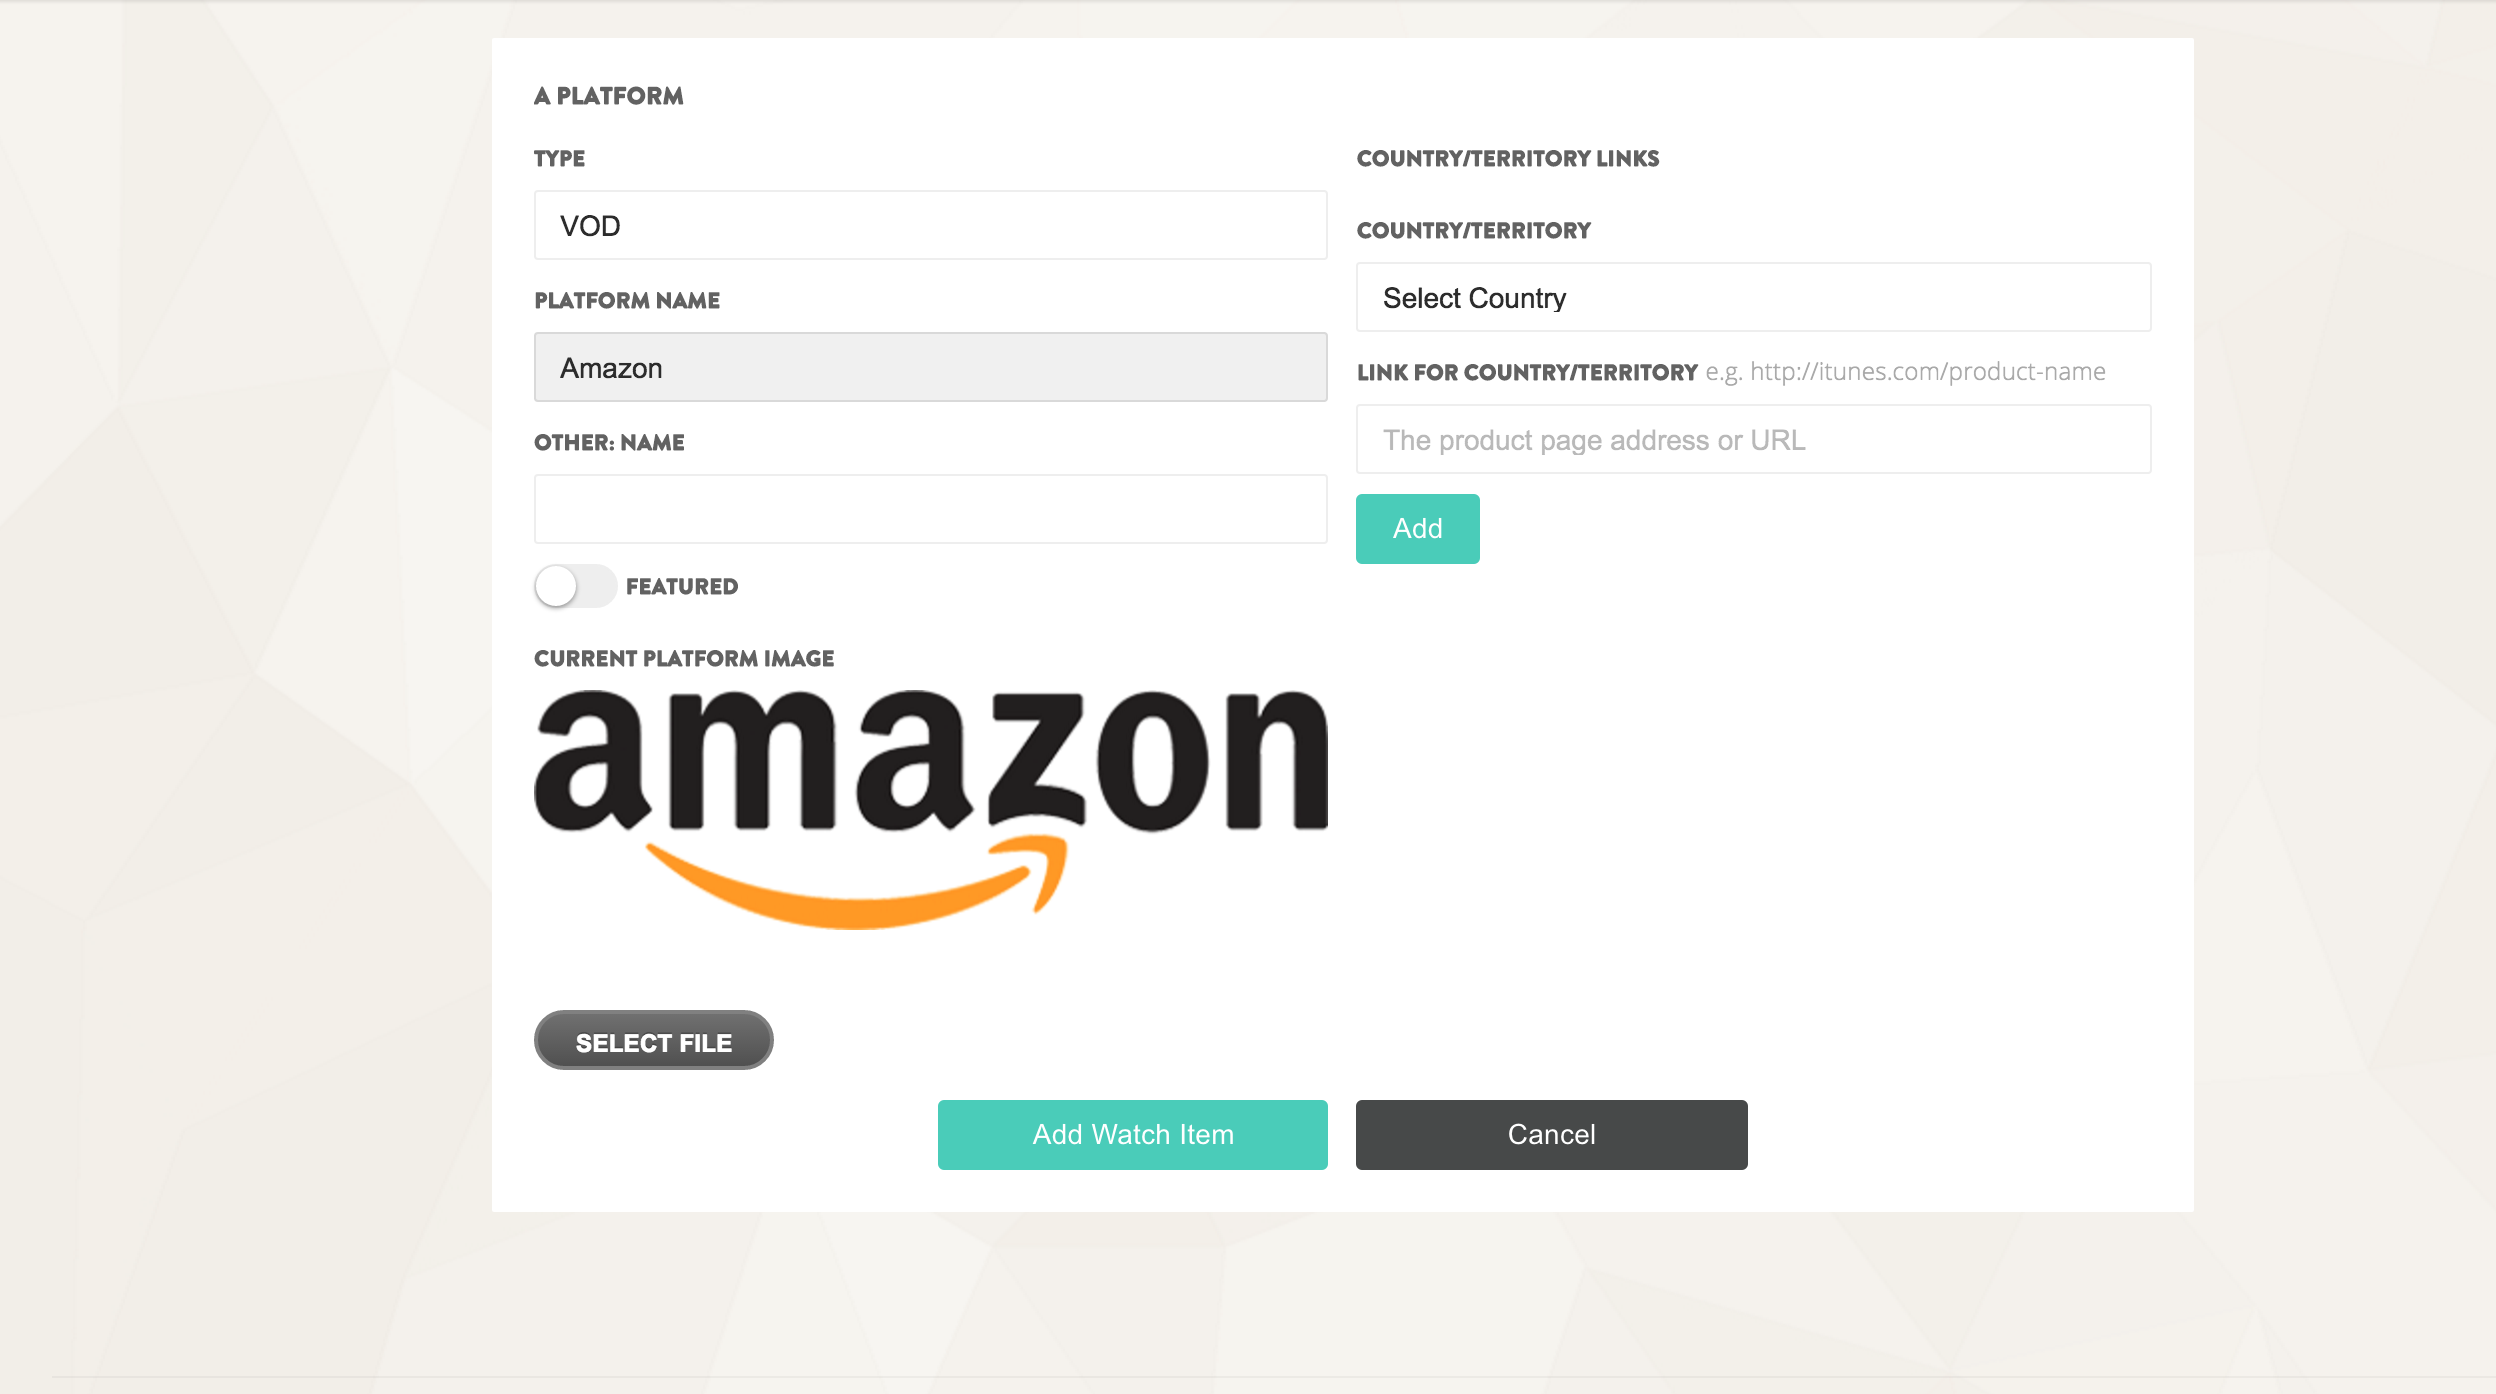
Select "Add Platform" to add a new platform.
TYPE: Under 'type' you have three options: VOD, DVD and BluRay.
PLATFORM NAME (VOD): Select the platform you are adding. The logo will automatically be loaded to the page. If your platform is not in the list, select ‘other’. This will prompt you to upload a logo - make sure it is a transparent .png file.
For DVD/Blu-Ray, there is no need to select a platform.
COUNTRY/TERRITORY: Our ‘Where to Watch’ feature allows you to add country-specific links, if you wish to. Simply select the country from the drop down menu, and add the link relevant to that territory below it. Press save, and repeat! If you do not want to geo-locate, simply select ‘worldwide’ in the dropdown menu and add the link. Don't forget to click ‘add’, and then to save the page.
2. Adding the module to the page
 Visit the pages editor in your left hand dashboard (content -> web pages)
Click ‘edit’ on the page in which you wish to add the module.
Add a new module, and select the ‘where to watch’ module from the dropdown list.
Take a moment to customize the module: You can edit what shows on the page by ticking 'Show VOD Links', 'Show DVD Links' and etc. You can also edit the header of the module (e.g. Watch our film!), and the module alignment, size and much more.
Save the module, and save the page!
3. Adding VOD
> For more information on adding modules to pages, see our modules help section.
Updated: April 2020
Continue reading -
Adding, Deleting or Editing Screenings
Assemble allows our users to add, delete or edit screenings, and display them automatically in the 'screenings' app on any page you choose.
To edit your screenings, visit Content -> Screenings
This brings you to your screenings dashboard.
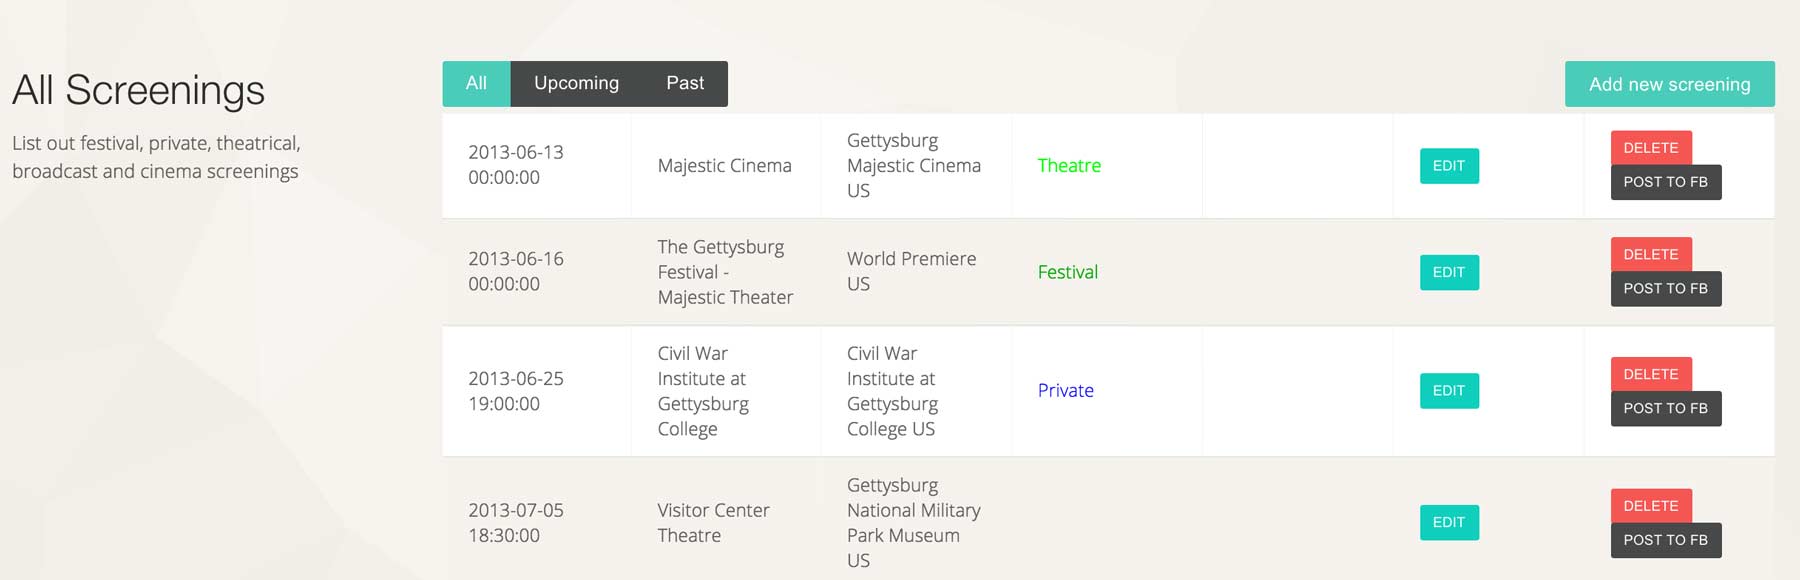
TO ADD A SCREENING
1. Select the 'add new screening' button at the top right of your screenings dashboard.
2. You will be prompted to select the type of screening you wish to add in a pop up window. Be sure to select the correct type of screening as it unlocks specific functionality.
3. Fill in the information as appropriate
4. Click 'add screening'
TO EDIT A SCREENING
1. Select 'edit' next to the screening you wish to amend.
2. Make your changes as appropriate
3. Be sure to saveTO DELETE A SCREENING
1. Select 'delete' next to the screening you wish to delete
2. Follow the promptsTO UPLOAD CSV - SIMPLE SCREENING SCHEDULE
TO UPLOAD CSV - ADVANCED SCREENING SCHEDULE
Updated: April 2020
Continue reading -
Tagging Images and Creating a Tagged Gallery
Visit Content -> High Res Stills on the left hand navigation bar in your Assemble dashboard
Tagging Images
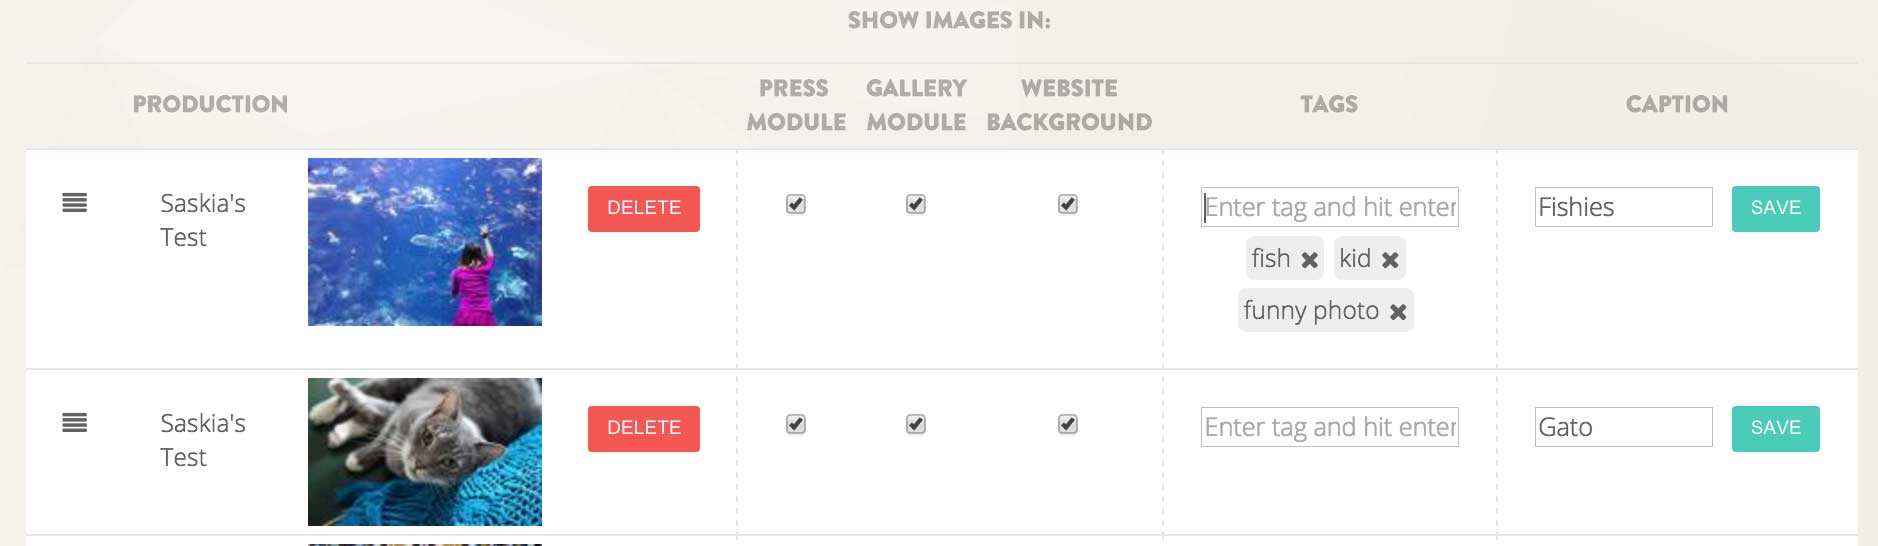
Locate the photograph you wish to add a tag to.
Type your tag into the 'tag' field
Hit enter once you've typed in the tag.
You will see that the tag automatically populates below the field.You can add as many tags as you wish, and use them to create specific photo albums (for instance 'behind the scenes' or 'production')
Creating a Tagged Photo Gallery
Assemble gives you the power to add a photo gallery on any page that loads only photos tagged with a specific word.
Visit Content -> Web Pages on the left hand navigation bar in your Assemble dashboard
Select the page in which you wish to add a tagged photo gallery.
Select the module in which you wish to add a tagged photo gallery.
Select the 'Gallery' option from the list of module options

In the gallery module editor, select 'Gallery with Tags'
Enter the tags you wish to load, and set the other settings according to your preferences.
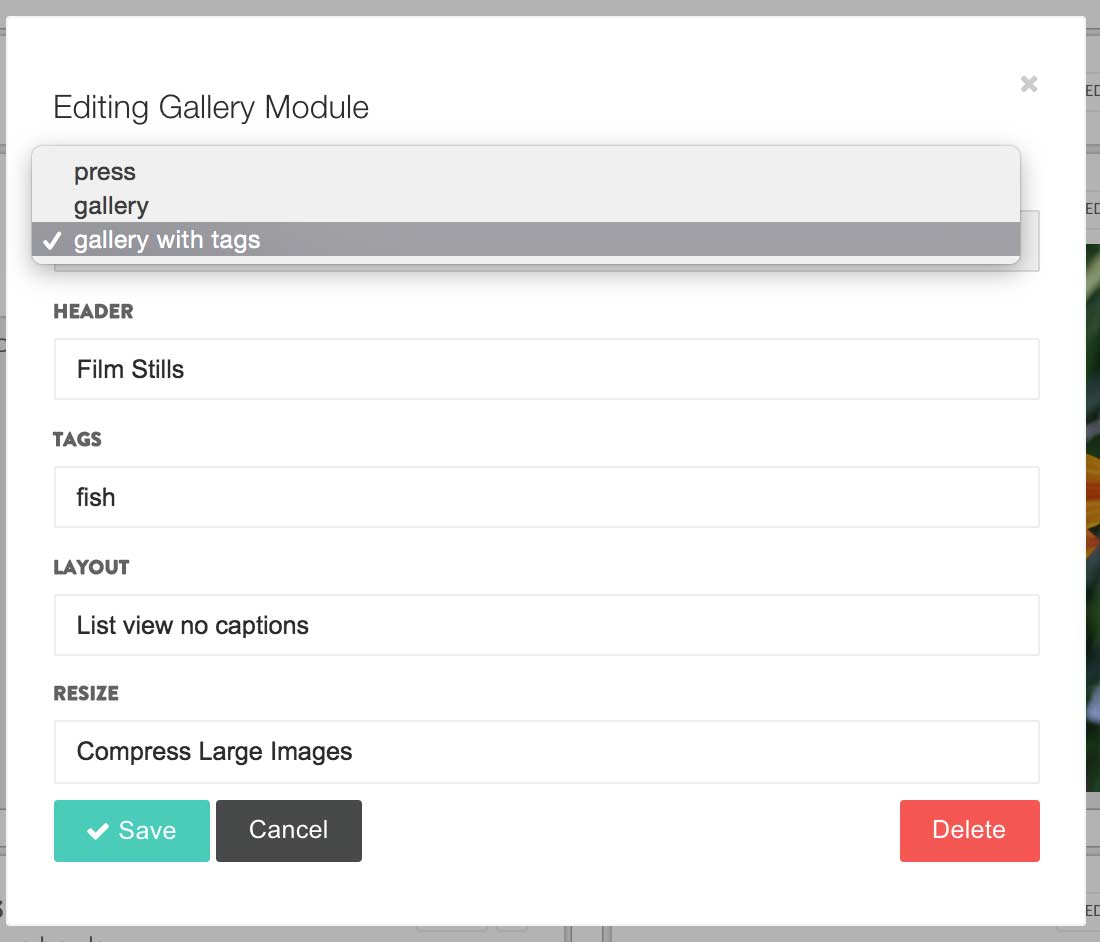
Be sure to save the module, as well as the page.
The page will now load a gallery of high res stills that have been tagged to the tag you chose (in this instance: 'fish')
Reviewed: April 2020
Continue reading -
Adding high res stills for Background, Press Stills or Photo Gallery
Assemble allows you to create image galleries at the click of a button.
Visit the Content -> High Res Stills on the left hand navigation bar in your Assemble dashboard
TO UPLOAD NEW IMAGES
1. Click 'Select file' under 'Add New Images'
2. Select the file on your computer you wish to upload
3. Once the image is uploaded, you have the capacity to assign it to one of three albums: Press Room, Image Gallery, Web and Trailer Background.N.B. If you add the 'gallery' content module on - say - an 'About' page, and adjust the settings to only show the ‘Press’ images, ONLY the photos ticked to 'press' will show up on that page. See our content module help topic for more information on modules. Also note: The background images will only show up if your website is set up to utilize background images.
TO RE-ORDER IMAGES
1. Grab the image you wish to reorder
2. Drag it to its new locationDon't forget to tag images and add captions!
Updated: April 2020
Continue reading
-
Company Details
If you have signed up to Assemble as a production company, you will be granted access to a section where you are able to enter company details.
To Adjust Your Company Details
Visit the left hand navigation bar on your Assemble dashboard, and select Settings -> Company Details
These settings define your company's set up, and also provide meta-data for search engine optimization.
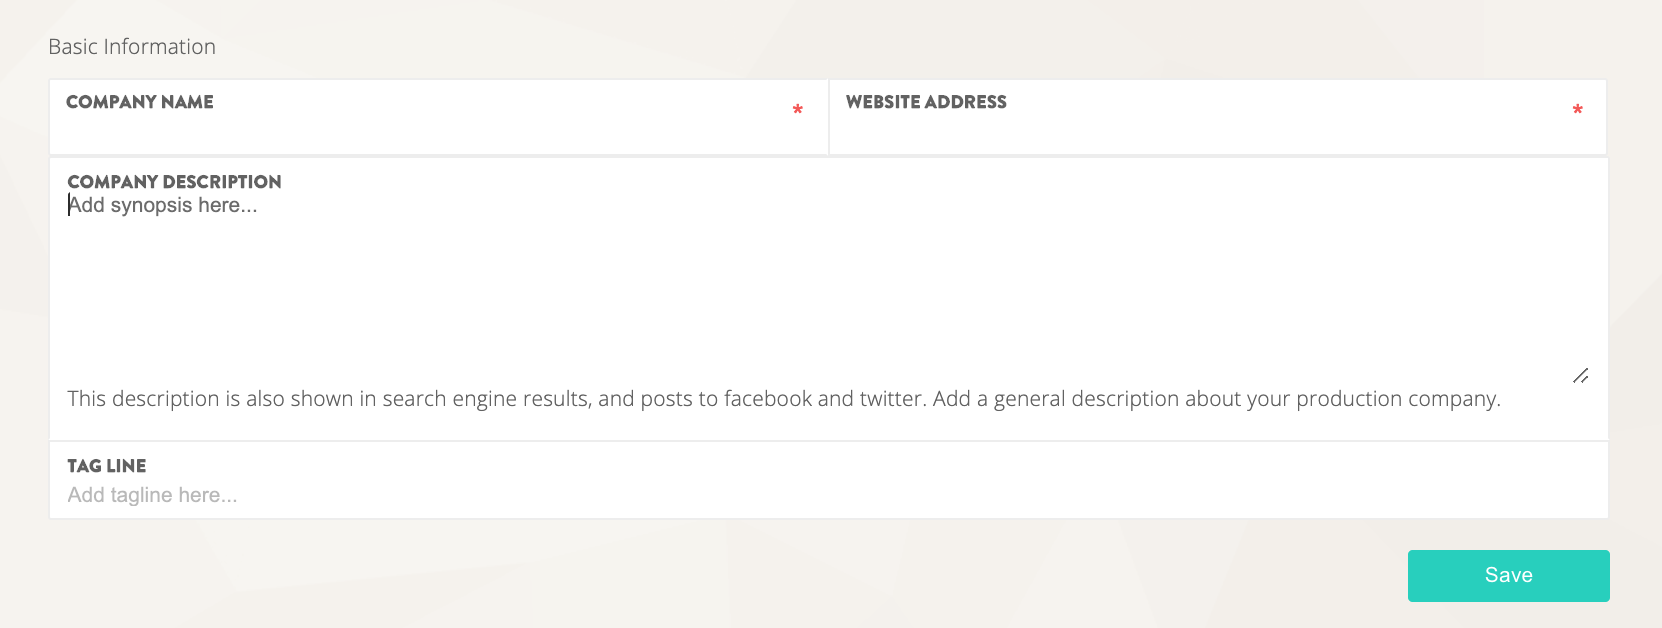
You will be asked to enter:
Company Name
Company Website
Company Description - Note that this description is also shown in search engine results, and posts to facebook and twitter. Add a general description about your production company.
Tag Line (eg: 'We make great movies so you don't have to')Updated: April 2020
Continue reading -
Production Details
Your production details pages is the hub for all your film's metadata.
To Edit Production Details
Mouse over the left hand navigation bar in your Assemble dashboard, and visit content -> production details.
You will be taken to a page that allows you to list information for the film, including tagline, cast and crew, year, and more. Some of this may already be filled out as it populates with the content you entered when you signed up for the system.
The settings on this page define your project, as well as tools that are available to you on Assemble. For instance if you select 'TV Series' in the production type list, then it will unlock your capacity to add Seasons and Episodes.
You are also able to add a trailer on this page, which will automatically load anywhere you add the 'trailer' app.
Updated: April 2020
Continue reading -
Setting Up Plugins and Apps
The Plugins setting page is where you can add and sync various platforms and social media sites.
To access the plugins setting page, look under the main settings in your dashboard (the button with the cogs and wheels).
Assemble supports many platforms, including:
- Facebook
- Tugg
- Tumblr
- Instagram
- Kickstarter
- Indiegogo
- Google Analytics
By plugging your links or information into the spaces allotted on the page, you will be 'adding' a platform to your Assemble site. Adding any one of the platforms on this page will immediately switch it on. For instance, by adding the Kickstarter details, the Kickstarter widget will appear on the homepage.
Be sure to save the page after you've added your information!
Contact us if you have any enquiries concerning any of these platforms, or want to incorporate another.
Updated: April 2020
Continue reading -
Add a Review
ADDING A REVIEW
(Before adding a review the app must be installed. Take a look at the video below for more instructions.)In the Production Details menu, select “REVIEWS” to access the reviews app.
Select 'add new review', and it will take you to a new page, where you can add the information.
Input the correct review information.
Generally the reviewer’s logo is added as the image, but be sure to keep the images sized consistently across the reviews!
Save, and return to the reviews app.
REORDERING REVIEWS
To reorder reviews, simply drag and drop the review in question, and place it in the order you prefer.

ADDING THE REVIEWS MODULE TO A PAGE
From now, when you choose the 'Reviews Press' module in the page editor, it will display all reviews.
Reviews are organised by the date added, so to reorder simply change the dates.
Updated: April 2020
Continue reading -
Edit an Existing Webpage
In the Website menu, select the “Web Pages” option.
This will take you to the page editor for that page, where you can change content modules or page appearance.
- Pages can be turned on or off with green toggle
-Pages can also be edited or deletedUpdated: April 2020
Continue reading -
Create a Gallery
In the Production Details menu, select “Hi Res Still” option.
Select the “Choose file” button.
Locate the designated images in your documents.
Select “Upload & Save Changes”
Once the images have uploaded, select the boxes underneath the Image Gallery column.
Now when you select the Gallery module in the page editor, images will appear in your website.
Updated: April 2020
Continue reading
